Snowflake Connected Application
The Connected Application enables organizations to store the results of their data scans directly in Snowflake AI Data Cloud for more efficient identification of data security blind spots. The Connected Application transfers the metadata of the data scan results securely into a separate database within Snowflake. Customers access the integration directly from their Normalyze account.
Learn more about Snowflake Connected Applications and the Normalyze native Snowflake integration for DSPM.
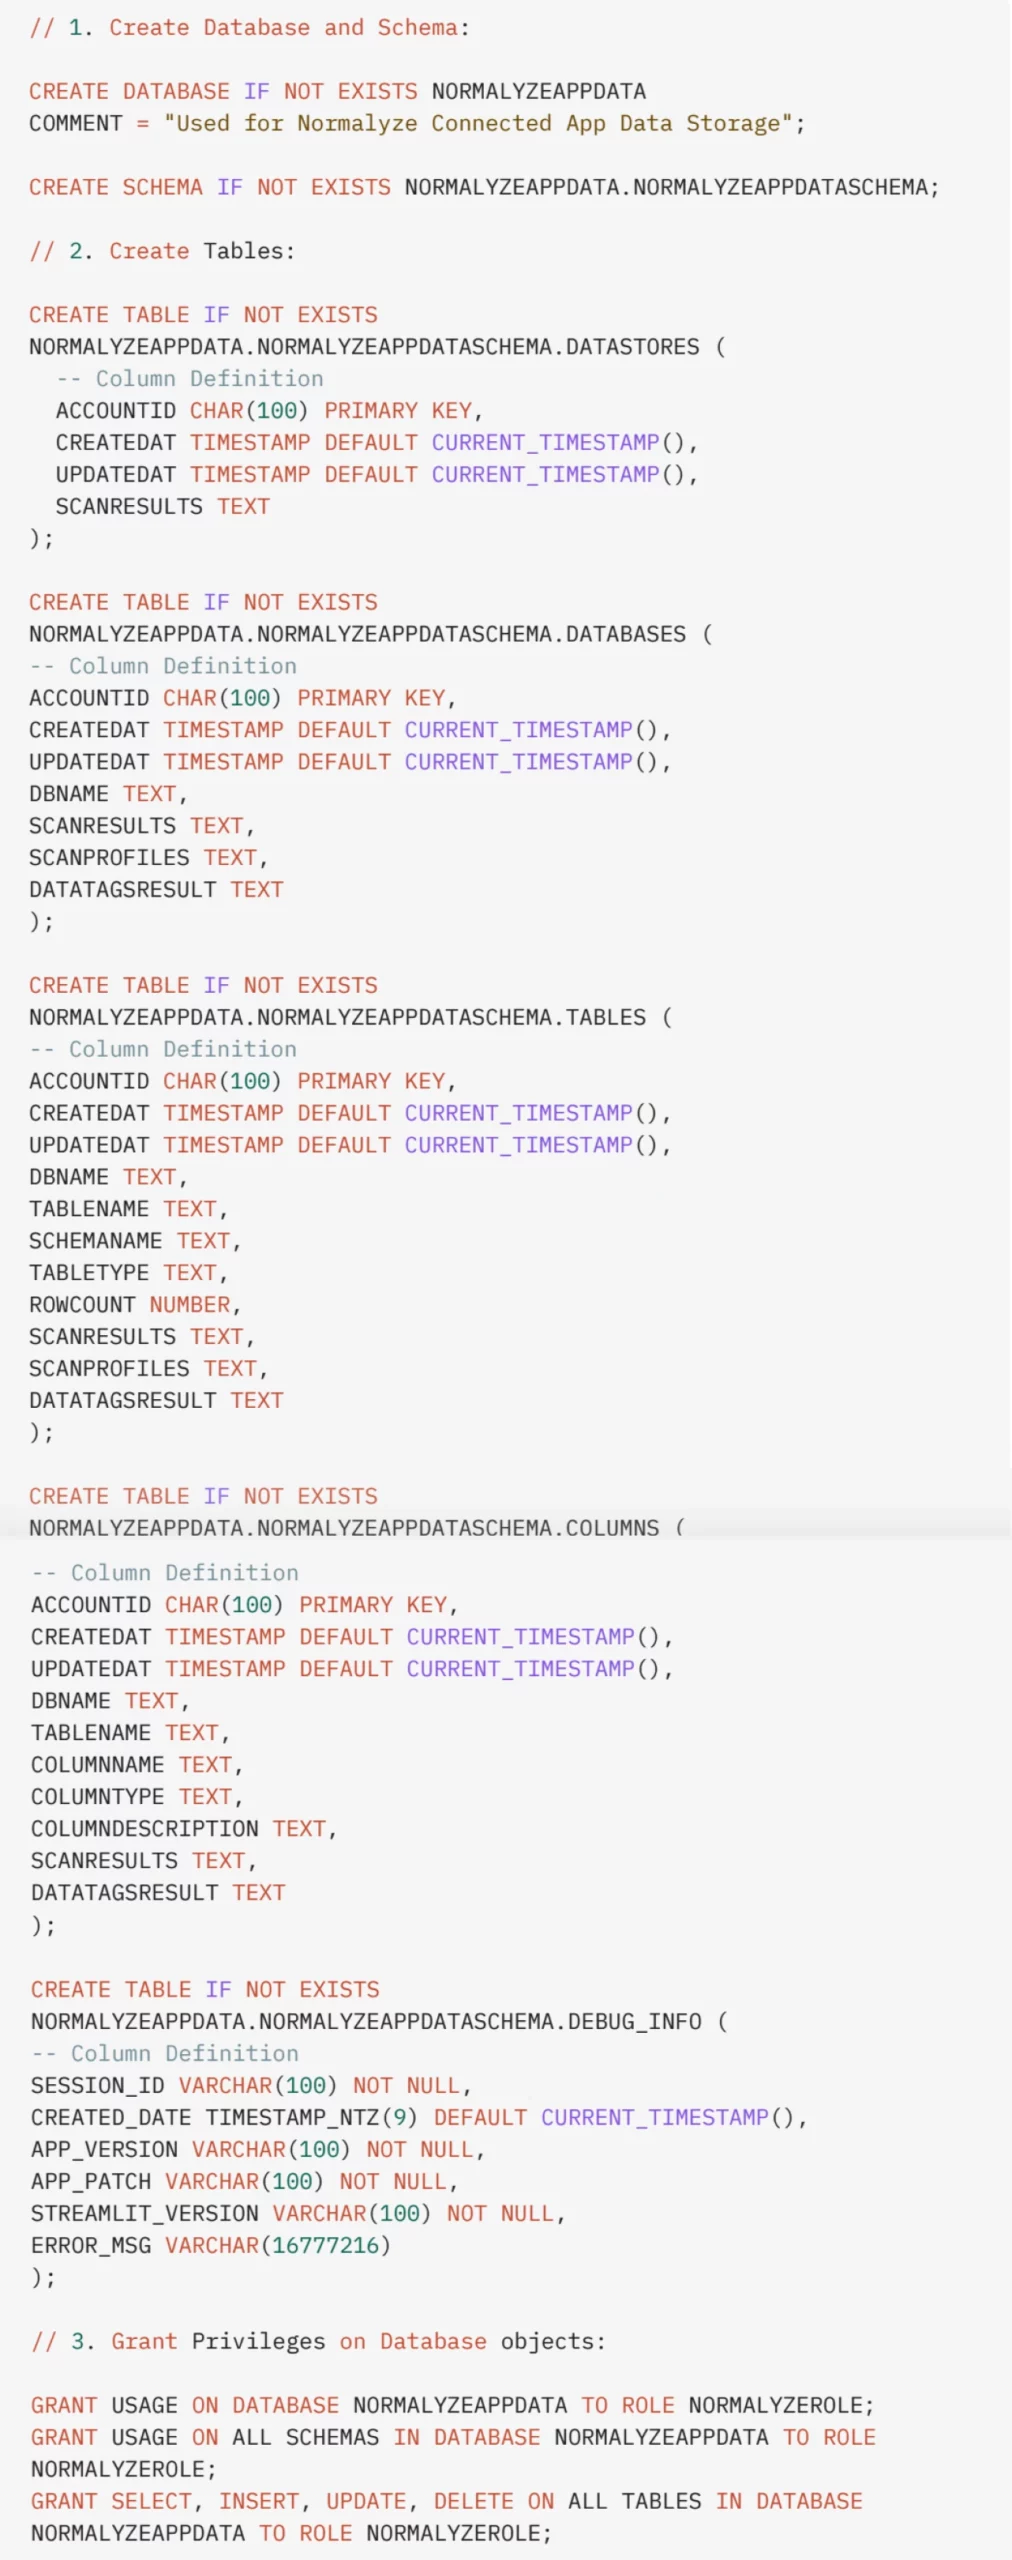
Snowflake Setup for Storing the Data Scan Results:
- Create a Database, Schema that will be used for storing the data scan results on Snowflake.
- The following Tables are created under the schema from Step 1:
- Datastores – Stores the account id value for the Onboarded account on Normalyze, Timestamp to store when the record is created (first instance of Data Scan Run), Timestamp to store when the record is updated (subsequent instance of Data Scan and Stores the metadata of the Data scan results (in JSON format).
- Databases – Stores the Database names along with the detected Entities, Profiles and Classification tag associated with each one of them respectively.
- Tables – Stores that Table name along with the associated Database, Schema, Type of table,Entities, Profiles and Classification tag associated with each one of them respectively.
- Columns – Stores that Column name along with the associated Database, Schema, Table, Description (if available),Entities, Profiles and Classification tag associated with each one of them respectively.
- Debug_Info – This table will capture the details for debug purposes in case of an event of app crash or any issues that the app encounter during the execution. This will be used for understanding the cause of the issue. Data from this table is not exposed on the UI of the Native App.
3. Grant the privileges on the Tables to the role defined for Normalyze usage.
SQL Script for setting up the aforementioned objects on the snowflake account:

The role being granted the privileges for the objects (NORMALYZEROLE in this script) should be the same as created for the Snowflake onboarding as part of the prerequisites.
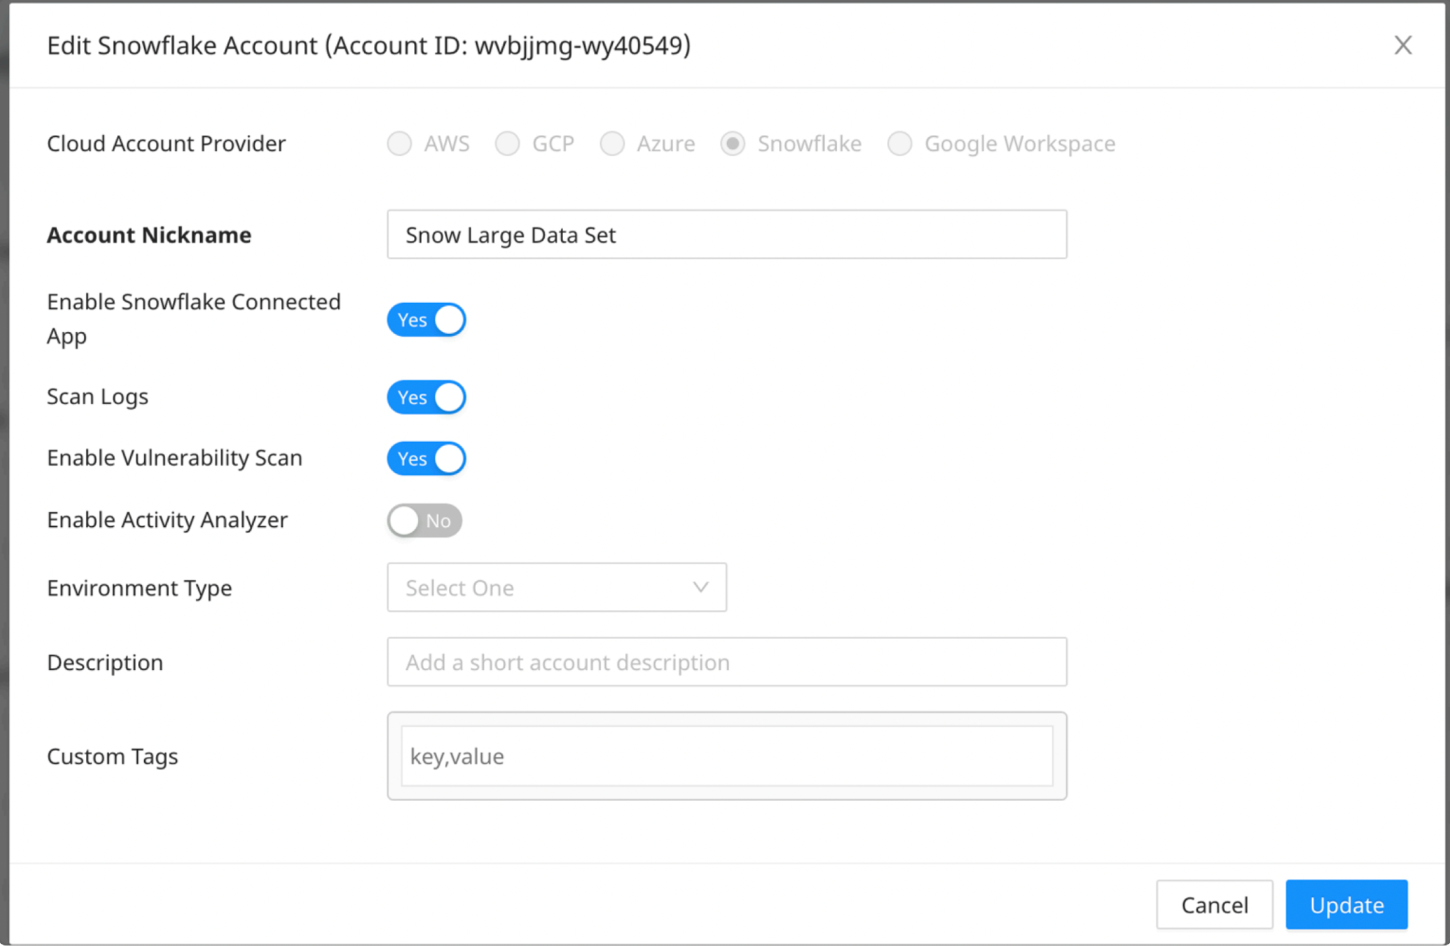
Steps to Enable Connected App Feature on Normalyze:
- From the Normalyze Application navigate to Workspace – Accounts.
- Select the Snowflake Account for which the feature need to be enabled.
- Select “Edit Account” from pane.
- Toggle Enable Snowflake Connected App option to Yes ( by default this is set to No ).

6. Select Update to complete the steps.
Once the above steps are completed, Normalyze will be able to send the metadata of the data scan results back to the Snowflake database.
The database objects being created are done so to ensure all the Normalyze data resides in the specific entity. For this reason the Database, Schema and the Table name has to be exactly as-is provided in the script.
